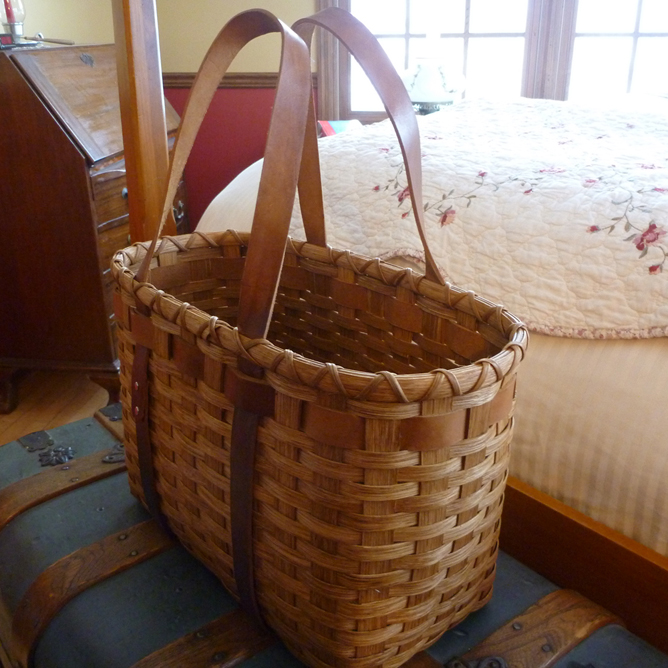
Leather Handled Tote Strapping Tutorial
Joanna’s Collections has designed several original totes and service baskets that use leather strapping as the handles. We love the appearance and feel of the sturdy leather in contrast with the natural look of the reed baskets. The leather strapping runs through the bottom of the Leather Handled Tote to create a strong support for hauling lots of important things - schoolbooks, lunches, or groceries will all be safe with the strength of this handle design.
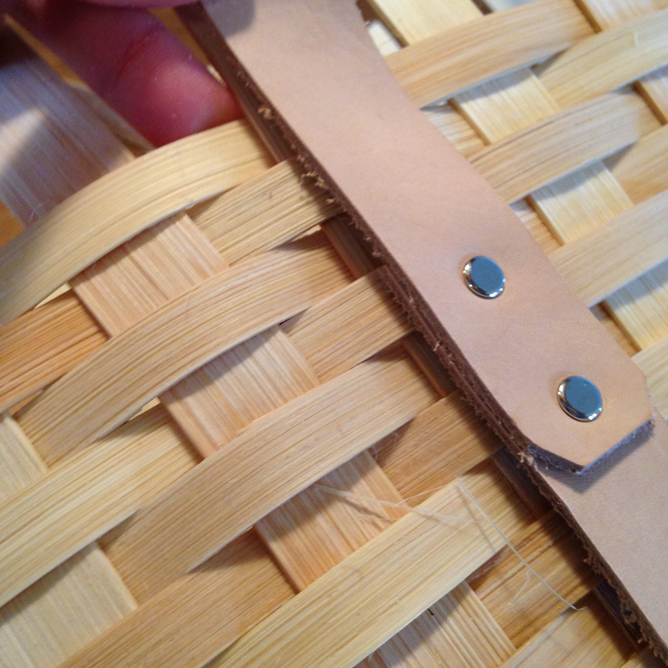
NOTE: We purchase our leather in entire hides to cut and assemble the strapping. Cowhides come in various lengths, so at times, we piece our leather handles in only two places, and other times, it is pieced in four places. If it is pieced only two times, there will be two riveted tabs – one on each side of the basket. If it is pieced four times, there will be four riveted tabs – two on each side of the basket. (The steps for weaving with either type of handles are the same.)
If you chose to purchase one of our kits or weave your own leather strapping into a tote, then this tutorial will show you how we accomplish that step in our patterns.
The Leather Handled Tote starts with a filled base, which you can find the tutorial for here. The only step that is different on the Leather Handled Tote base is adding the leather strapping underneath the third stake to the right and left of the center stake.
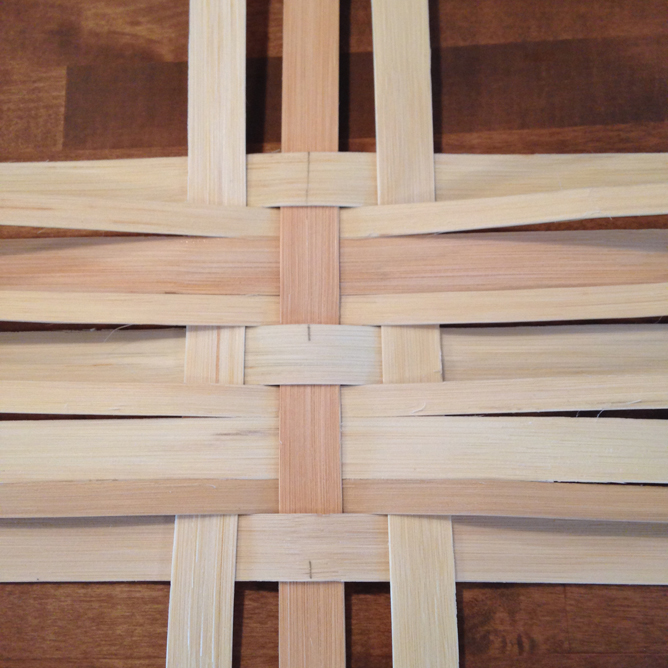
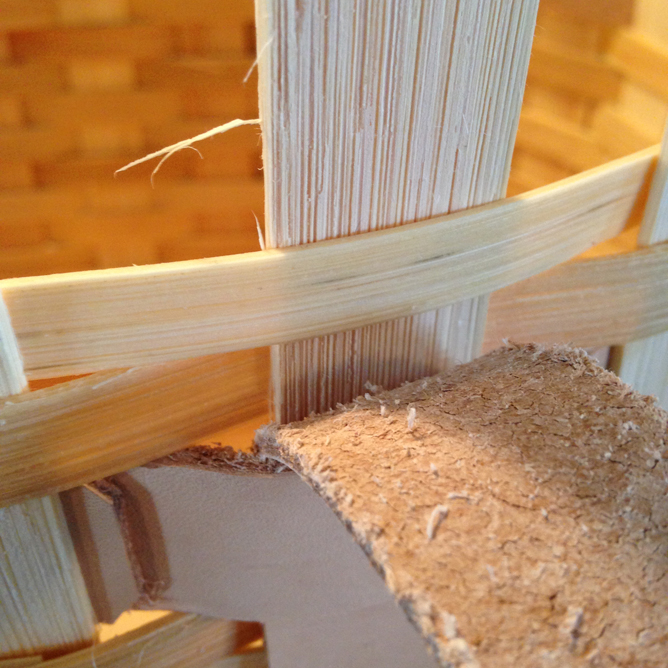
Start by marking the center on the third stake to the right of the center stake. Line up the center of the third stake with the marked center on the leather strapping. (For the large Leather Handled Tote, the center is 11½” from the blunt end of the strapping; for the Little Leather Handled Tote, the center is 8” from the blunt end.)
Make sure that the tab on the riveted section of the leather handle points downward when you lift the strapping to face you. If it isn’t, then find the center on the other side of the leather strapping and line it up with the third stake. It should look like this:
Weave the strapping in underneath the stake.
Do the same with the center marks on the third stake to the left of the center vertical stake. Make sure the handles form one untwisted loop.
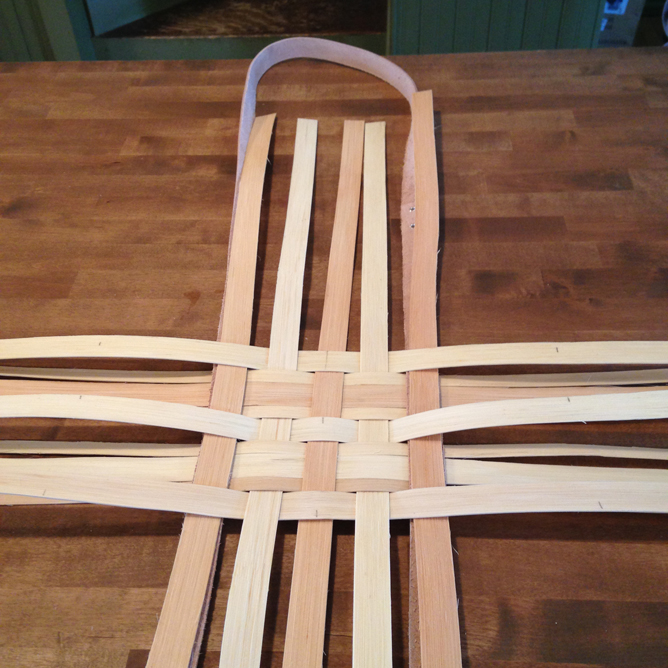
Now continue weaving the base by adding the remaining vertical stakes – two on each side of the leather handles.
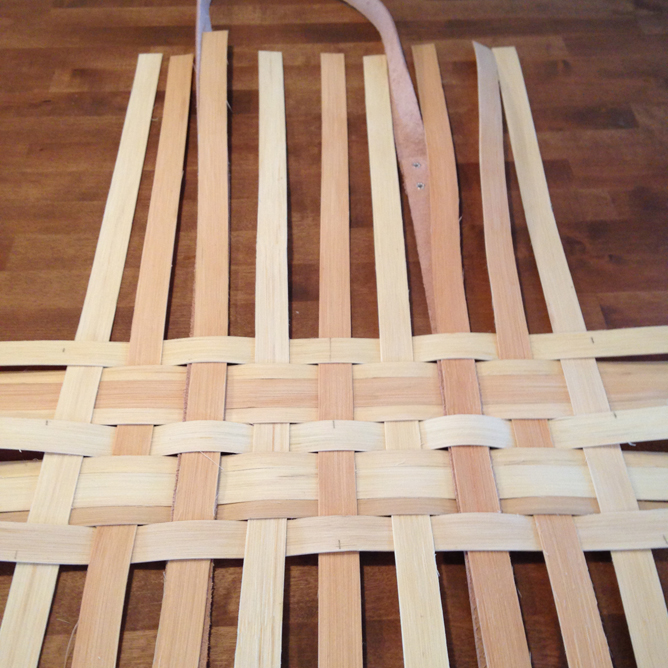
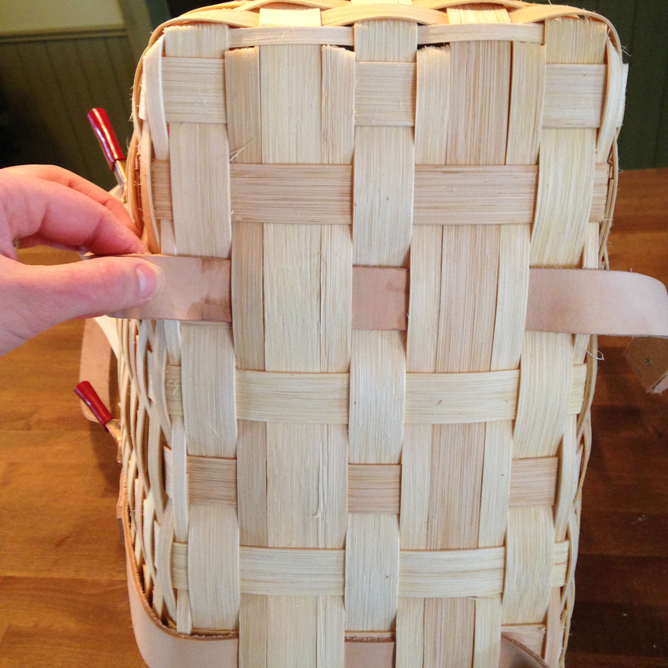
The next step is to clip and tuck the fillers into the same stake as the leather weaver.
Simply lift the stakes and the leather with the flat-tipped weaving tool and slide the fillers in a crossed pattern.
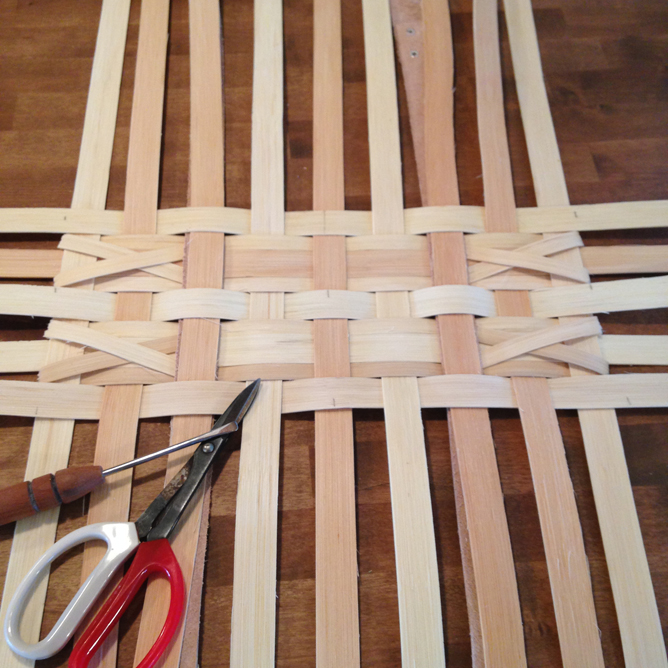
The last step of the base is to add the locking row. When weaving a locking row with leather strapping, simply pretend that the leather isn’t there. Weave the locking row in between the leather and vertical stake, not under the leather!
Now you’re ready for the sides. To weave the first two rows of a Leather Handled Tote, we keep the base flat on the counter and lift the stakes in a 90-degree angle. Do nothing with the handles other than just keeping them out of the way!
Once you are ready for the third or fourth row, lay the basket onto its side and bring the two leather straps towards you to keep them apart from the sides. You’ll ignore the leather for a total of 17 rows on the Leather Handled Tote (or whatever your pattern calls for); weave the sides like normal, keeping the leather handles out of the way.
After you’ve reached the correct number of reed weavers your pattern calls for, pull the leather handles up and pin them to the stakes to hold them in place.
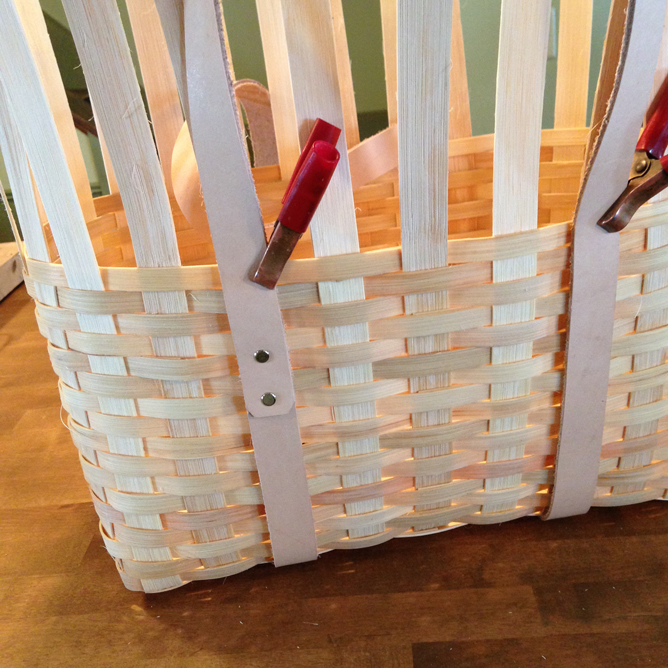
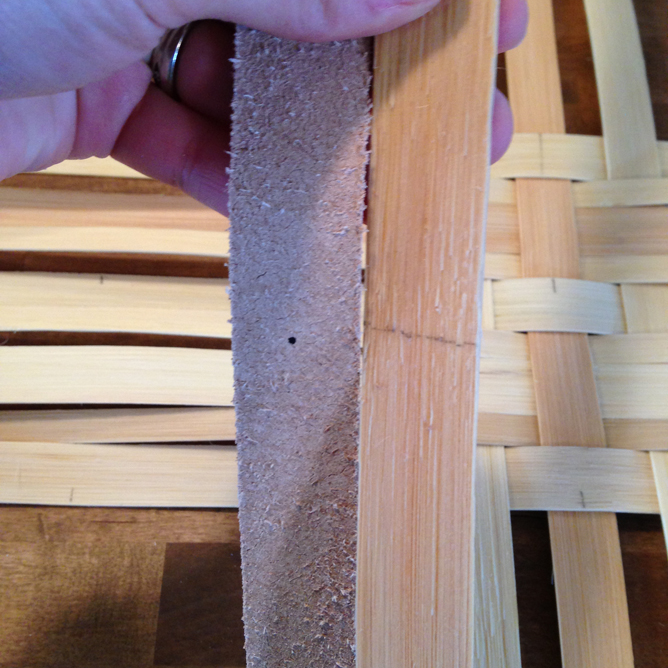
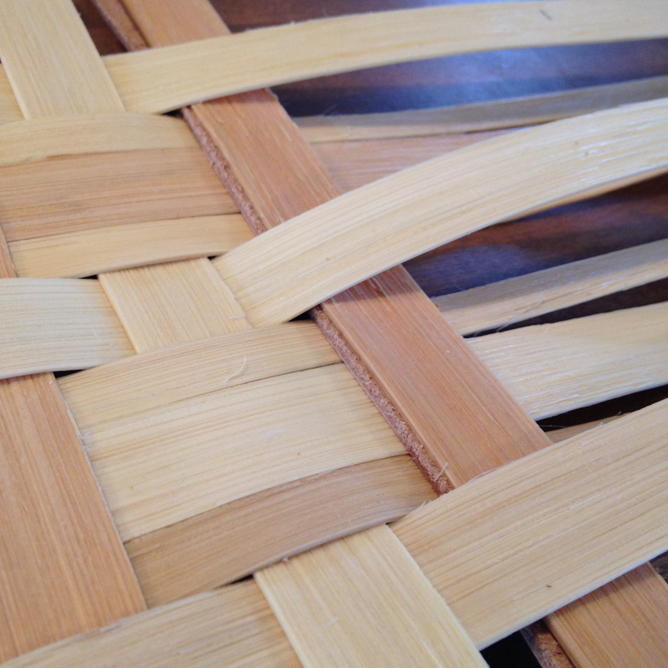
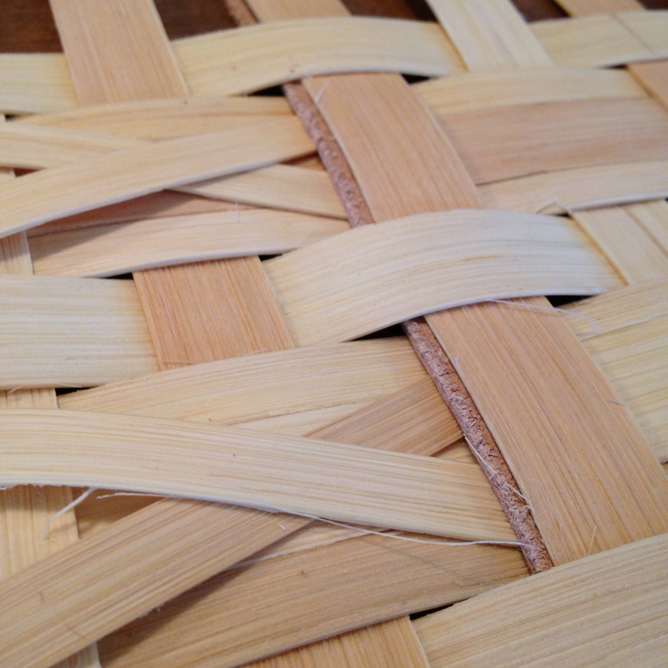
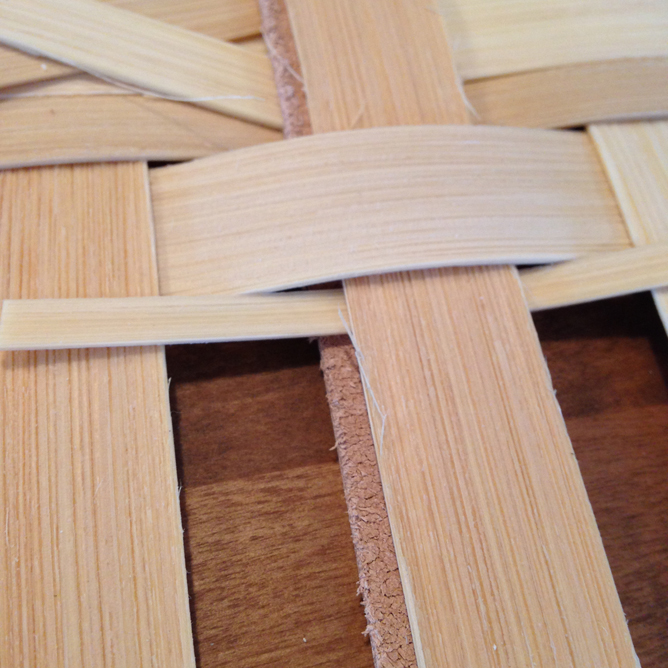
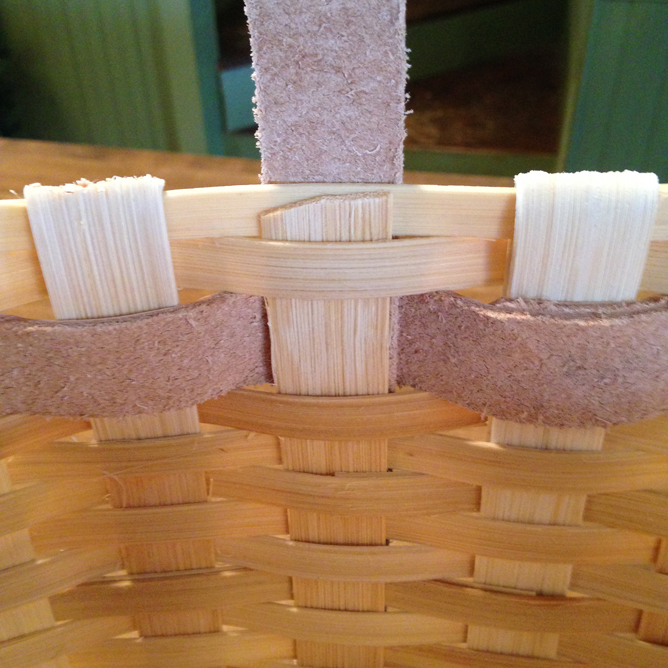
Before weaving the leather accent weaver in place, check to see that the riveted tabs line up accurately on each side. We do this by eyeballing the distance from the blunt end to the top of the last weaver. On this example, I wanted the blunt back of both tabs to be three rows from the top.
If they are uneven, you can pull the leather through the base to gain some slack from the other side.
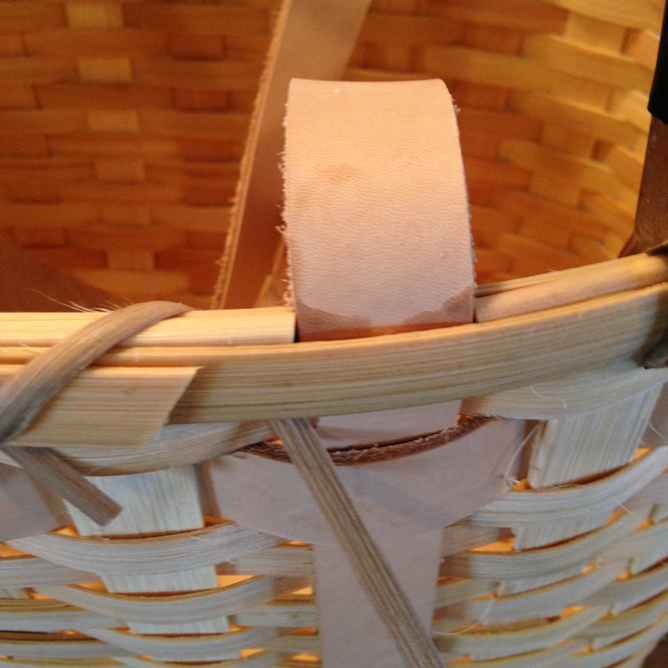
Next weave the leather accent in place. This time, be sure to treat the vertical stakes and the leather handles as one piece as you weave the leather accent around them. We like to cut the end of the weaver into a neat tab and let it stick out a little rather than hiding it behind the stake.
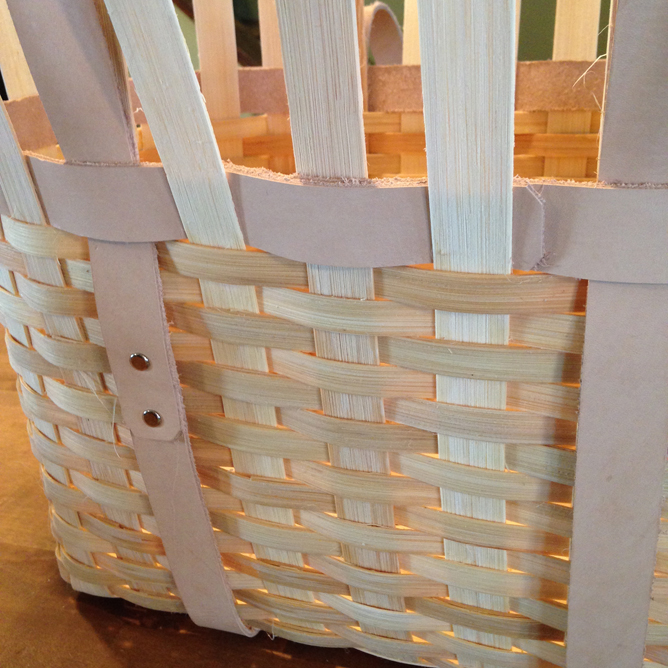
Each of our patterns calls for two more reed weavers after the leather accent. Weave these rows as normal, while being sure to not weave around the leather handle this time. Let the handles fall away from the basket!
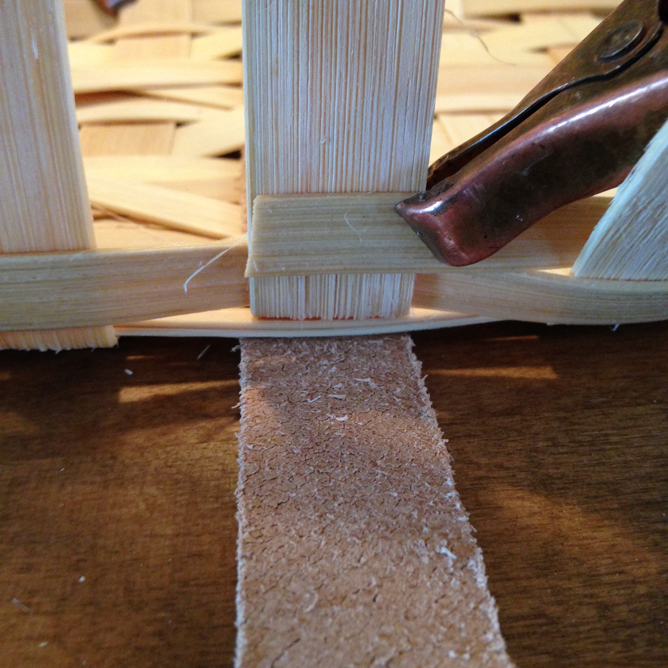
After you’ve woven the last row of 3/8” reed, clip and tuck the stakes. Your leather strapping should be on a stake that you will clip off at the 3/8”. (Be sure not to cut the leather.) You should end up tucking each stake to the right and left of each leather handle.
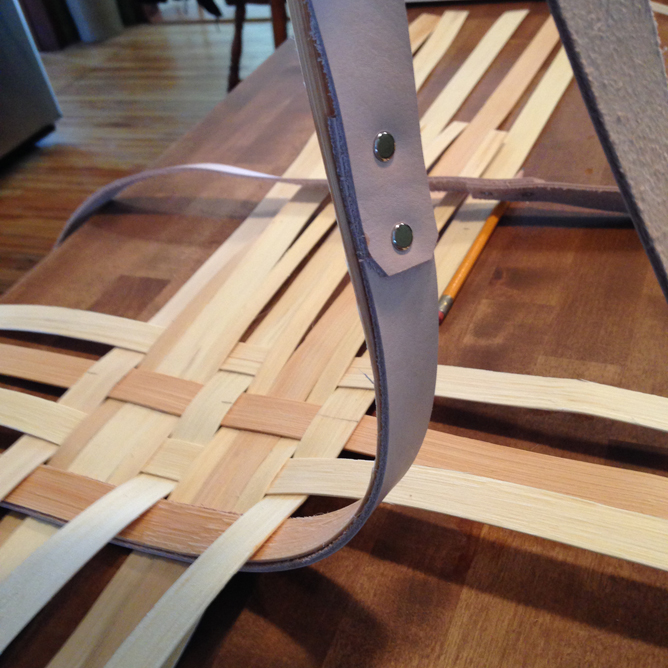
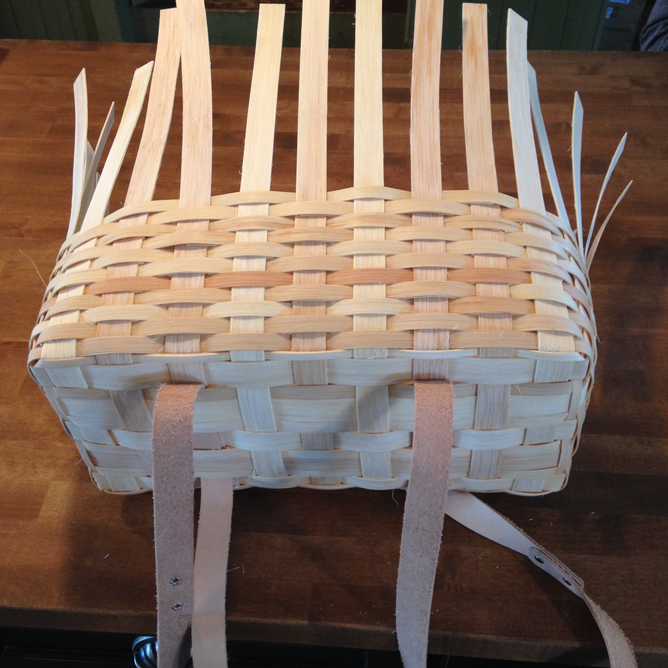
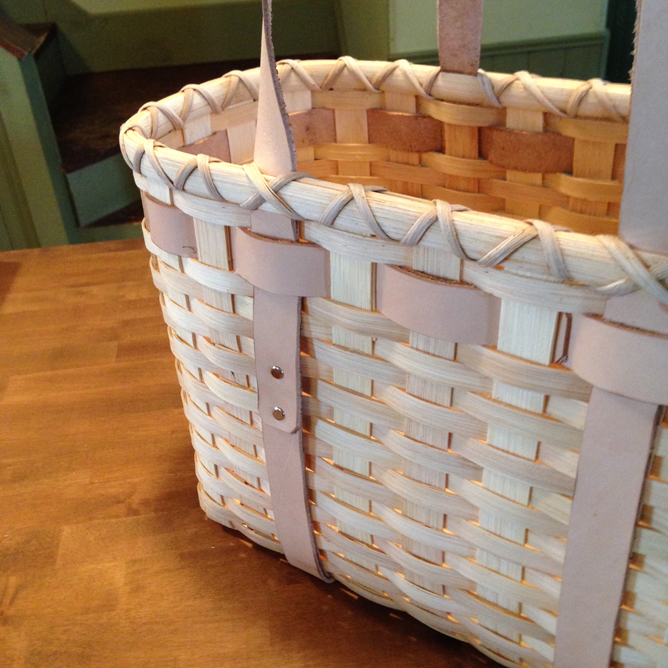
The last step in our patterns is to double-lash the rim. Begin by pinning the inside rim into place. You don’t have to do anything with the handles on this step.
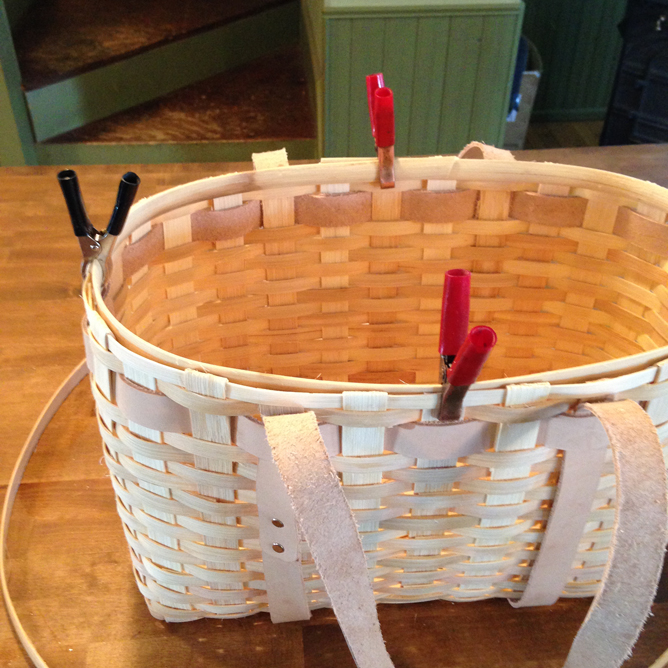
Start your fishhook on the outside center of the basket. Pin the outside rim into place while sandwiching the leather handles in between the two rims. Make sure to line up the leather strapping with the stake it’s covering. At this point, just allow the handles to fall into the basket. You’ll be able to lash around them for the rest of the rimming process.
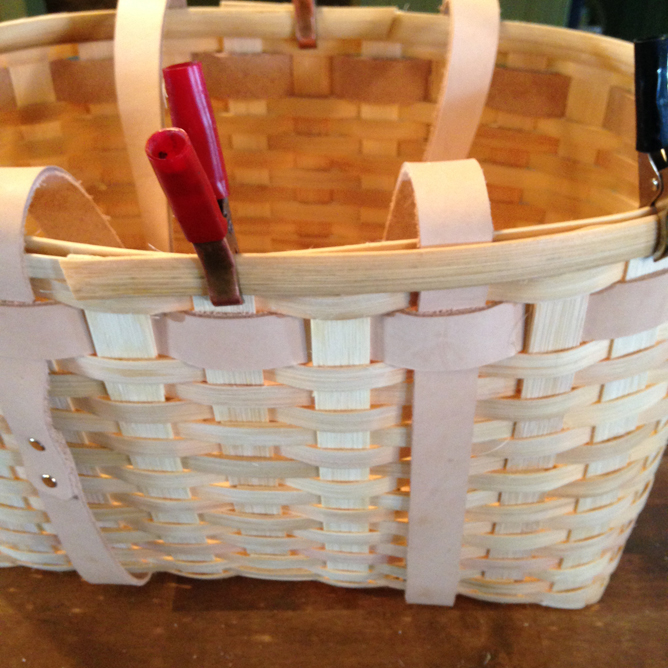
Cut the round rim filler into sections to fit between each handle and pin it in place.
Continue to double lash the rim, making an “x” over the front of each handle. And that’s how it’s done!
Recent Comments
I always like the handles when they are lashed between the rims. Thanks for sharing!
Thank you again for all the hard work on the tutorials and the patterns. You have inspired me to take my weaving to a higher level. I eagerly wait for your next post to see what new idea or trick I can incorporate into my weaving.
Thank you
John
Share This


Recent Entries
- Basket Finishes
- June ‘26 Free Pattern
- May ‘26 Free Pattern
- April ‘26 Free Pattern
- March ‘26 Pattern
- View Archive
Categories
Weaving Lessons
- Basket Finishes
- Staining Tutorial - With or Without Leather
- Weaving with a Wooden-Bottom Base Tutorial
- Wire and Bale Handles
- Weaving with Leather Handles
- Twining a Round Base Tutorial
- Leather Handled Tote Strapping Tutorial
- Singeing Tutorial
- Twining the Last Weaver Tutorial
- Sea Grass Continuous Weave Tutorial
- To stain or not to stain … that is the question!
- Shaping the Sides of a Basket Tutorial
- Double-Lashing Tutorial
- Clip and Tuck Tutorial
- Weaving the Sides Tutorial
The Basket Blog
Basket Finishes
June ‘26 Free Pattern
May ‘26 Free Pattern
Details & Such
Wholesale Inquiry?
If you are interested in wholesale pricing, please .(JavaScript must be enabled to view this email address) that has "wholesale inquiry" in the subject field.
Contact Information
.(JavaScript must be enabled to view this email address)
1422 Martha St N
Stillwater, MN 55082

Weaving Lessons
- Basket Finishes
- Staining Tutorial - With or Without Leather
- Weaving with a Wooden-Bottom Base Tutorial
- Wire and Bale Handles
- Weaving with Leather Handles
- Twining a Round Base Tutorial
- Leather Handled Tote Strapping Tutorial
- Singeing Tutorial
- Twining the Last Weaver Tutorial
- Sea Grass Continuous Weave Tutorial
- To stain or not to stain … that is the question!
- Shaping the Sides of a Basket Tutorial
- Double-Lashing Tutorial
- Clip and Tuck Tutorial
- Weaving the Sides Tutorial
Thank you for perfect tutorial. Good and lovely work.
Silvia
Silvia 02/24/15